
ActionHero 使用 MySQL 及 Vue 範例
這個範例是新增使用者到 MySQL
Migrations
首先建立一個 Migration 幫助新增資料表,新增 from ./src/migrations/0000001-createUsersTable.js 檔案
module.exports = {
  up: async function (migration, DataTypes) {
    await migration.createTable(
      "users",
      {
        guid: {
          type: DataTypes.UUID,
          defaultValue: DataTypes.UUIDV4,
          primaryKey: true,
        },

        firstName: {
          type: DataTypes.STRING(191),
          allowNull: false,
        },

        lastName: {
          type: DataTypes.STRING(191),
          allowNull: false,
        },

        email: {
          type: DataTypes.STRING(191),
          allowNull: false,
        },

        passwordHash: {
          type: DataTypes.TEXT,
          allowNull: true,
        },

        lastLoginAt: {
          type: DataTypes.DATE,
          allowNull: true,
        },

        createdAt: DataTypes.DATE,
        updatedAt: DataTypes.DATE,
        deletedAt: DataTypes.DATE,
      },
      {
        charset: "utf8mb4",
      }
    );

    await migration.addIndex("users", ["email"], {
      unique: true,
      fields: "email",
    });
  },

  down: async function (migration) {
    await migration.dropTable("users");
  },
};
Models
接著新增 User Model,新增 src/models/User.ts檔案到專案中
import * as bcrypt from "bcrypt";
import {
  Model,
  Table,
  Column,
  AllowNull,
  IsEmail,
  BeforeCreate,
  HasMany,
} from "sequelize-typescript";
import * as uuid from "uuid/v4";

@Table({ tableName: "users", paranoid: true })
export class User extends Model<User> {
  saltRounds = 10;

  @Column({ primaryKey: true })
  guid: string;

  @AllowNull(false)
  @Column
  firstName: string;

  @AllowNull(false)
  @Column
  lastName: string;

  @AllowNull(false)
  @IsEmail
  @Column
  email: string;

  @Column
  passwordHash: string;

  @BeforeCreate
  static generateGuid(instance) {
    if (!instance.guid) {
      instance.guid = uuid();
    }
  }

  async updatePassword(password: string) {
    this.passwordHash = await bcrypt.hash(password, this.saltRounds);
    await this.save();
  }

  async checkPassword(password: string) {
    if (!this.passwordHash) {
      throw new Error("password not set for this team member");
    }

    const match = await bcrypt.compare(password, this.passwordHash);
    return match;
  }
}
在處理使用者密碼的部份,有使用bcrypt,記得要安裝套件
npm install bcrypt --save
Action
將資料庫相關都處理好之後,就是 Action 啦,新增 ./src/actions/user.ts
import { Action } from "actionhero";
import { User } from "../models/User";

export class UserCreate extends Action {
  constructor() {
    super();
    this.name = "user:create";
    this.description = "create a new user";
    this.outputExample = {};
    this.inputs = {
      firstName: { required: true },
      lastName: { required: true },
      password: { required: true },
      email: { required: true },
    };
  }

  async run({ params, response }) {
    const user = new User({
      firstName: params.firstName,
      lastName: params.lastName,
      email: params.email,
    });
    await user.save();
    await user.updatePassword(params.password);
    response.userGuid = user.guid;
  }
}
Vue.js 範例
記得先修改 ActionHero 專案中的src\config\servers\web.ts,將 port 從 8080 改為 8081,避免跟 Vue 專案衝突
// Port or Socket Path
port: process.env.PORT || 8081,
在 Vue 專案中的 component 新增 data
data() {
  return {
    user: {
      firstName: '',
      lastName: '',
      password: '',
      email: '',
    },
  }
},
接著新增 template 的部份
firstName: <input v-model="user.firstName" /><br />
lastName: <input v-model="user.lastName" /><br />
password: <input v-model="user.password" /><br />
email: <input v-model="user.email" /><br />
<button @click="addUser">Add User</button>
最後是 javascript 的部份
addUser() {
  console.log(this.user);
  axios.post('http://localhost:8081/api/user:create?apiVersion=1', this.user).then(res => {
    console.log(res.data);
  });
}
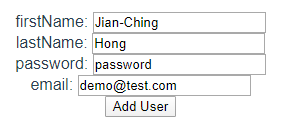
完成結果
透過這些已經可以新增使用者
Vue 使用畫面
Console 回傳結果

SQL 查詢結果

參考資料
actionhero/ah-sequelize-plugin: sequelize plugin for actionhero
留言